Send personalized in-app messages using AirTable & Integromat
There are plenty of awesome no-code tools out there, tools like AirTable and Integromat enable you to build fully-fledged products without writing a single line of code.
In this guide, we're going to query our user table located on AirTable and send a personalized in-app message to each user.
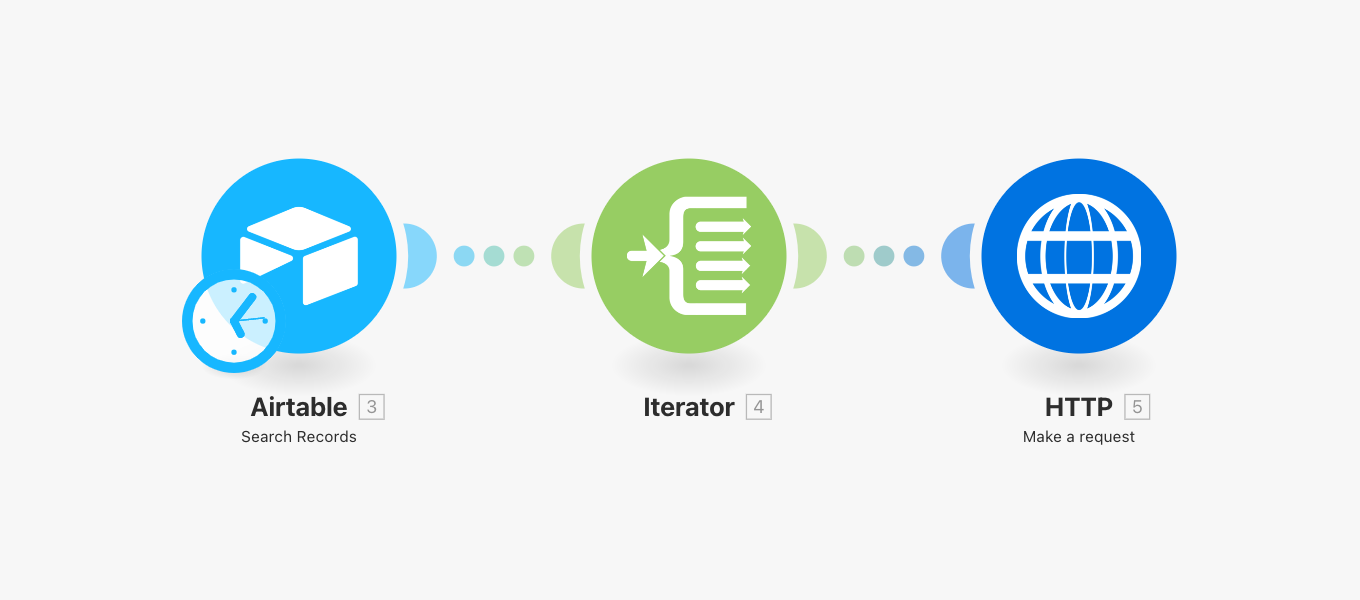
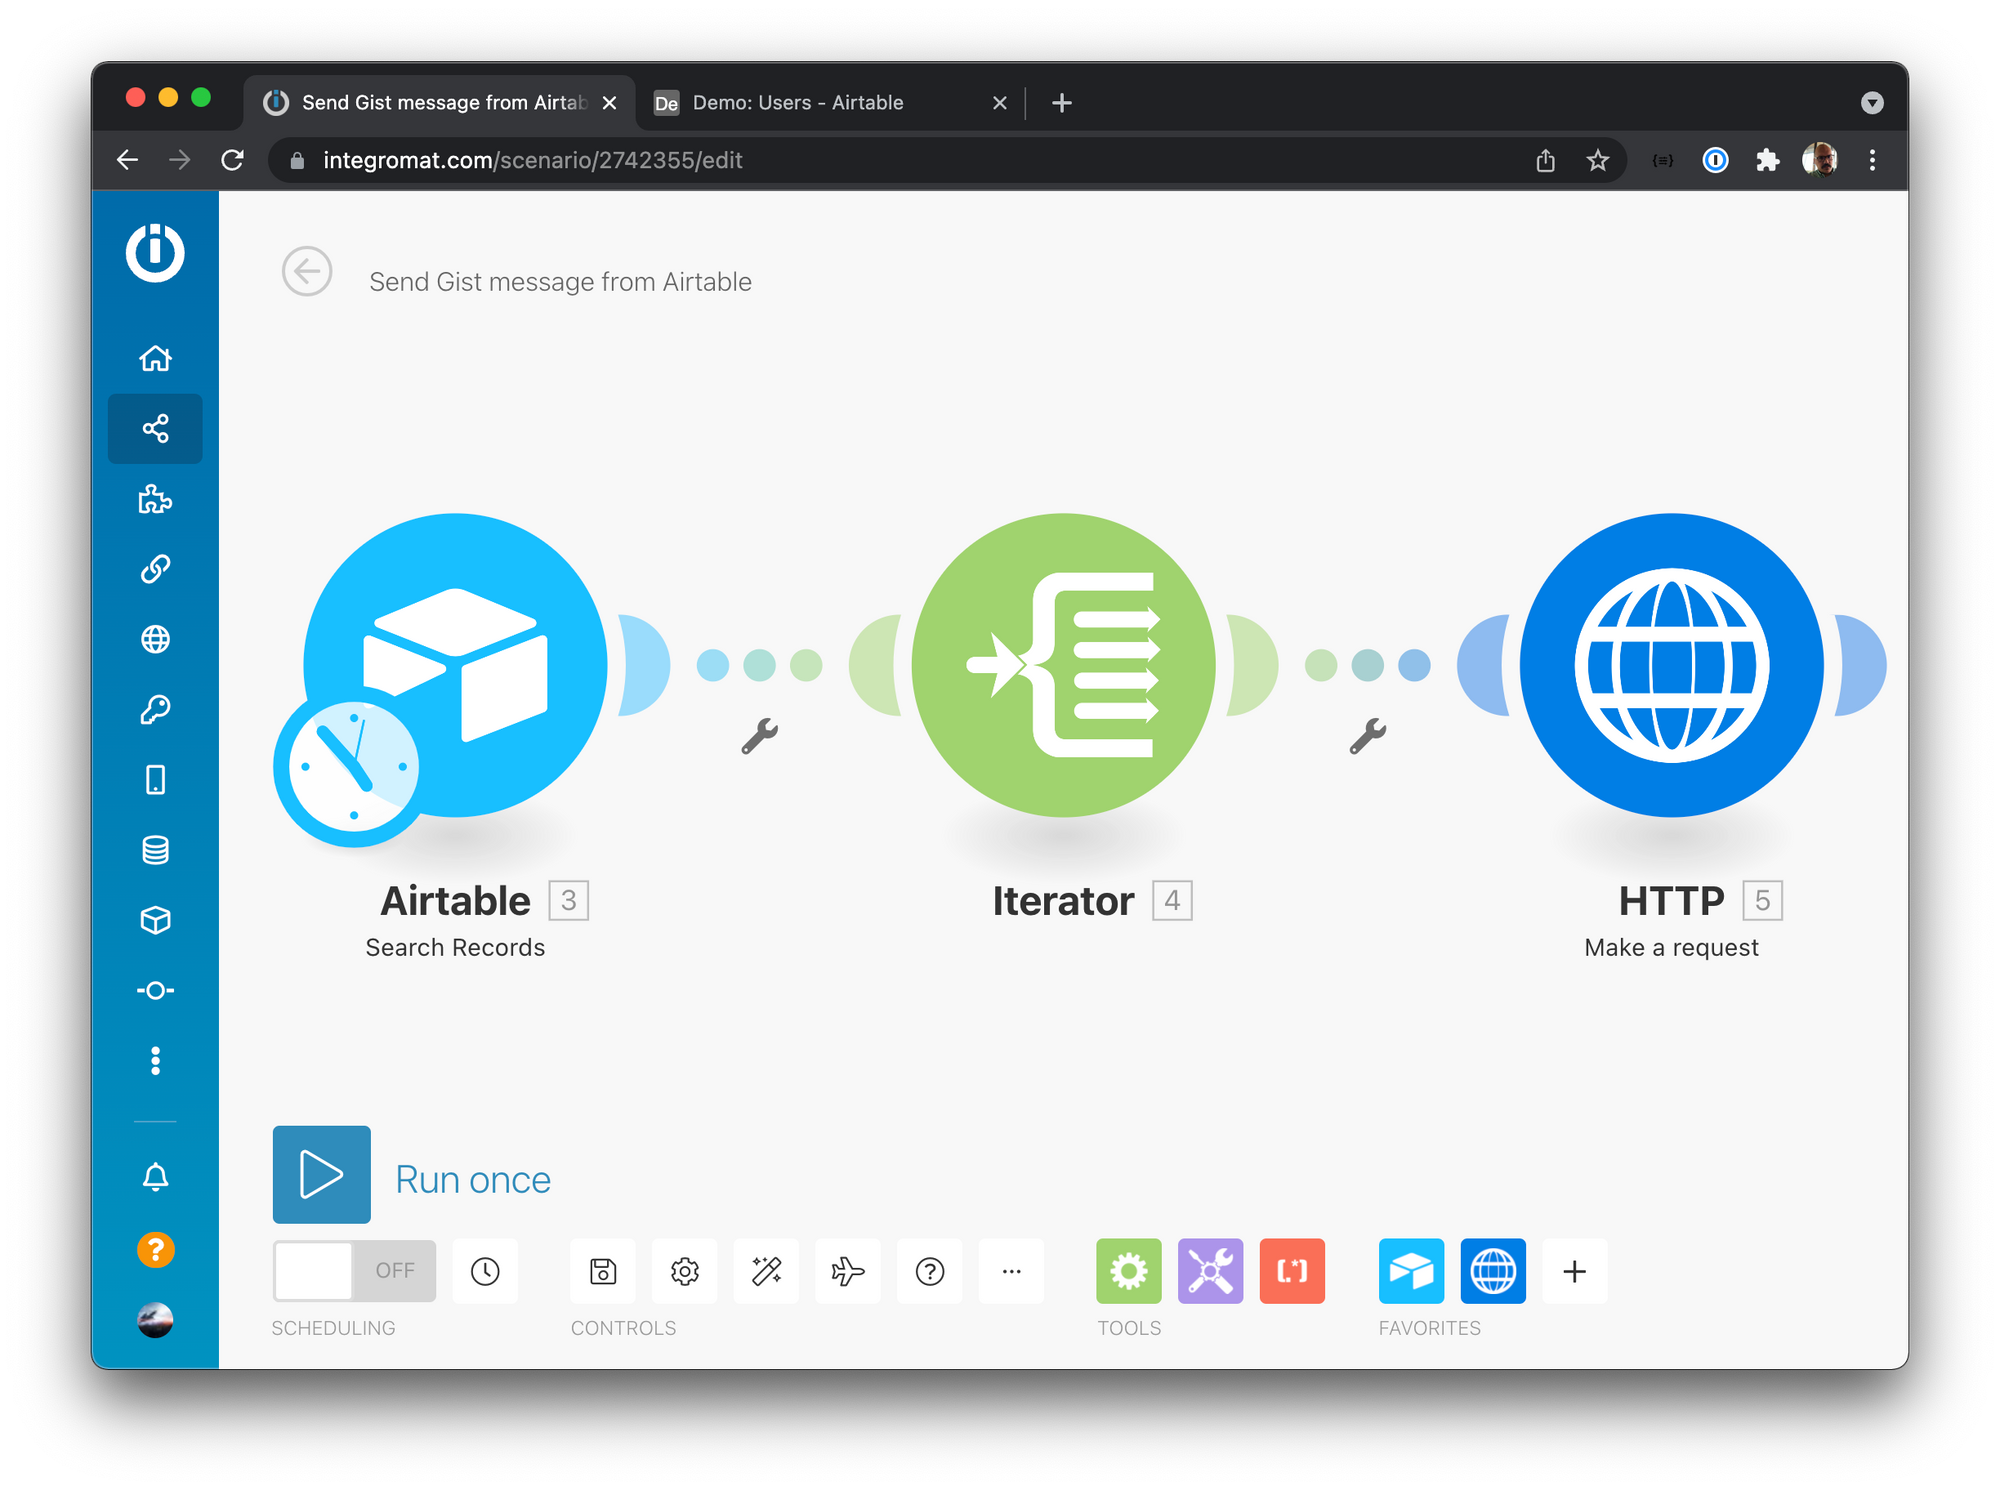
Our Integromat Scenario
- Airtable - Query our customer information.
- Iterator - Go through each record and fetch customer details.
- HTTP - Send the in-app message via Gist.
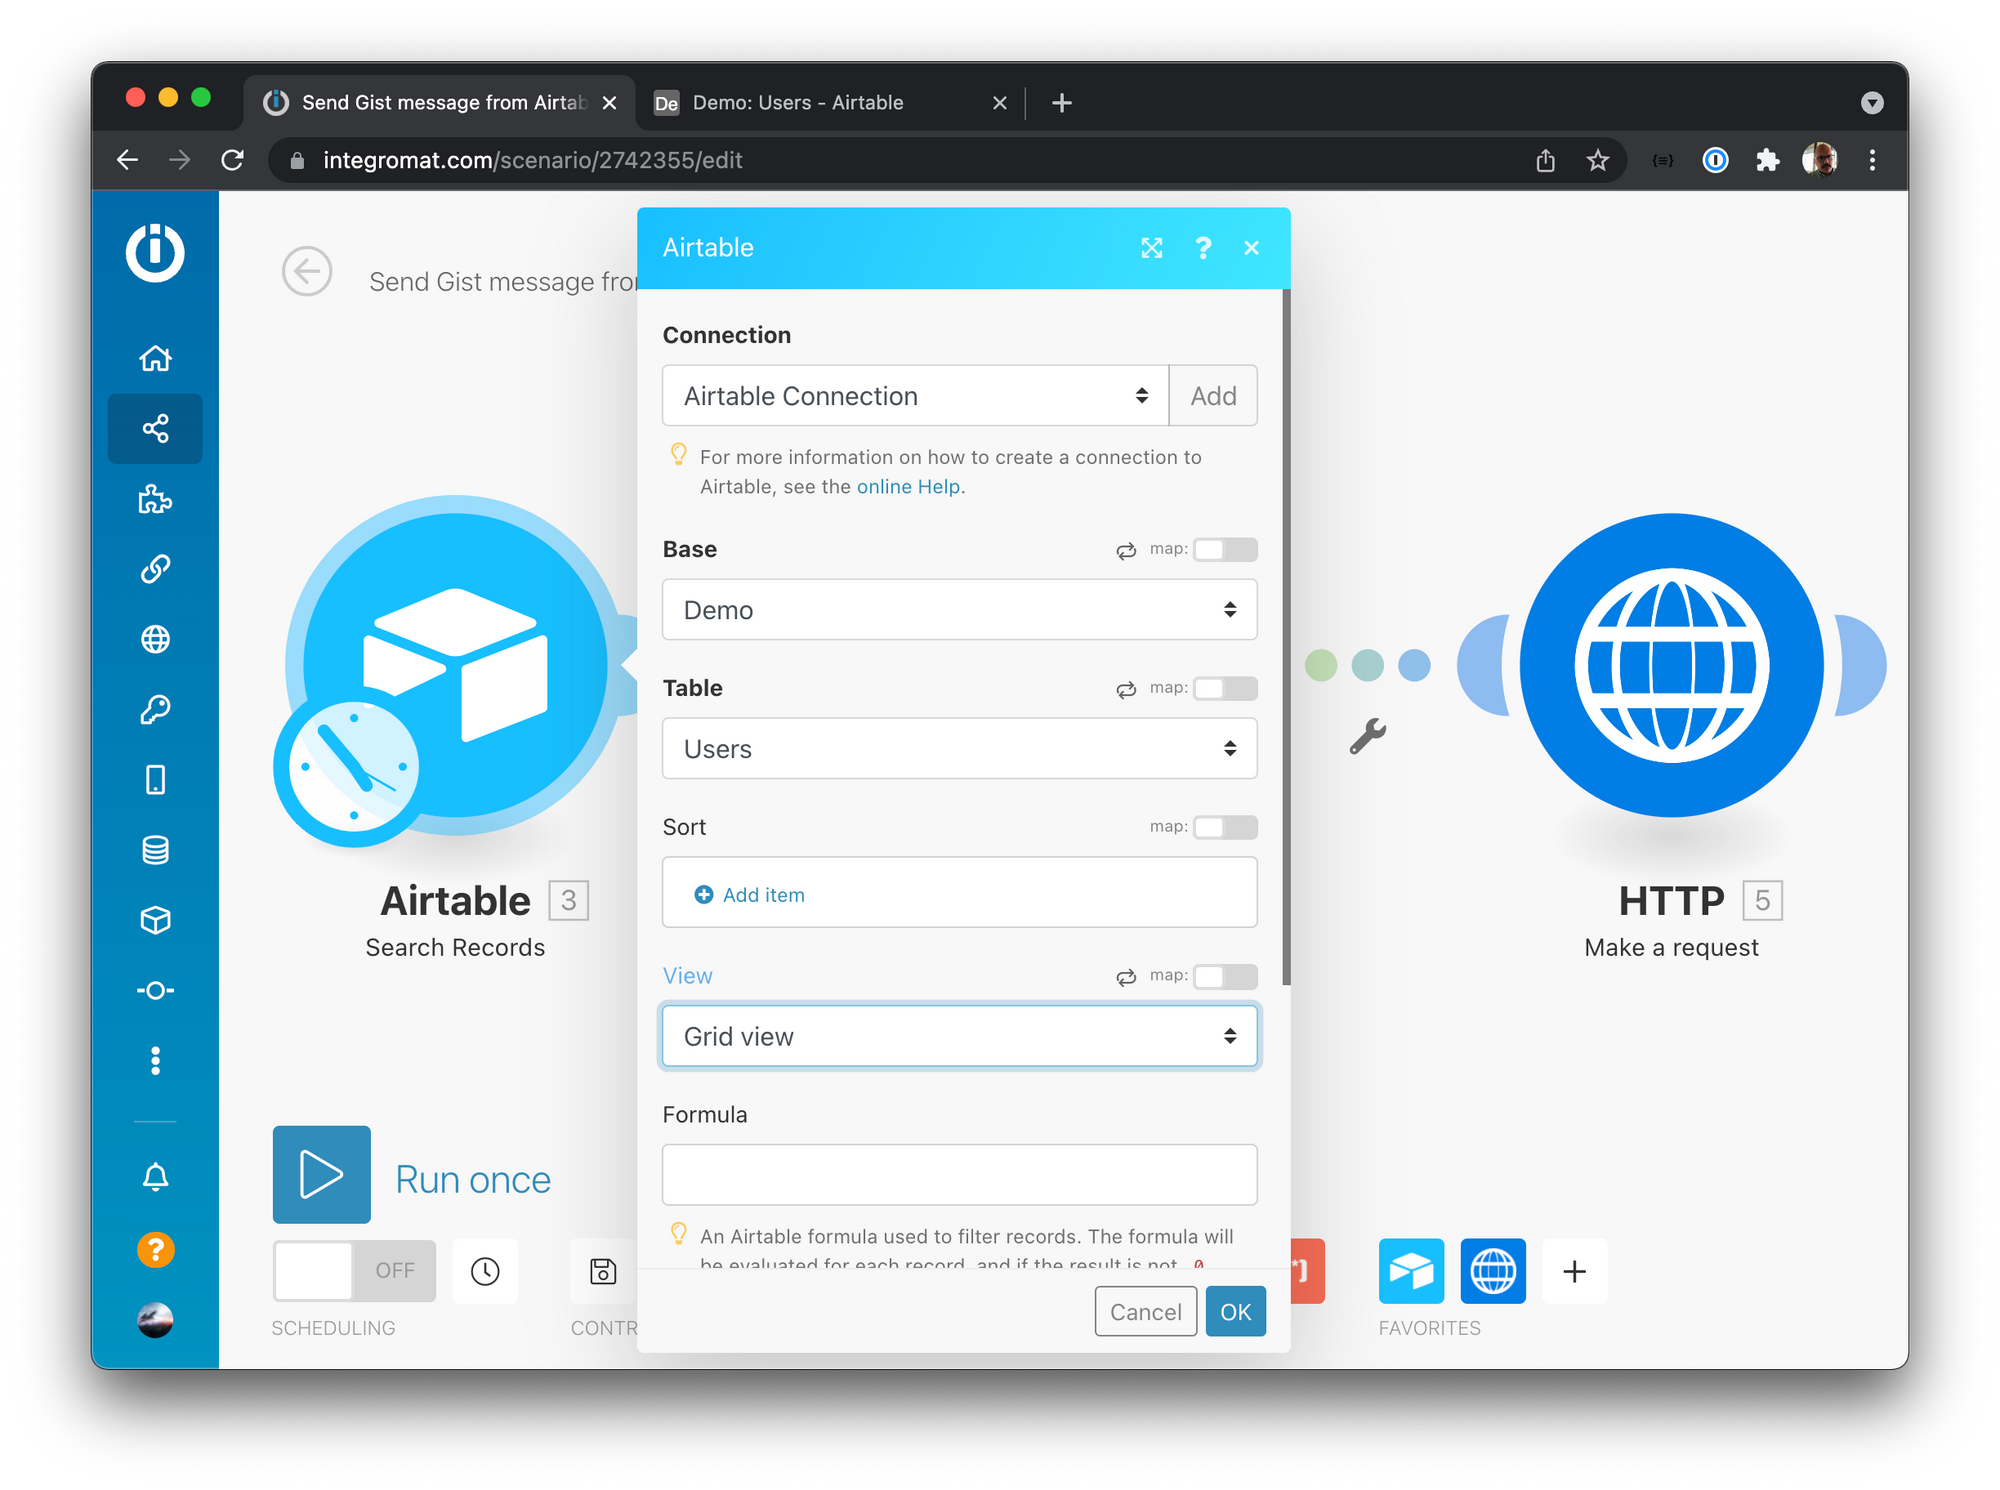
We begin by connecting our AirTable demo view to Integromat. Add the connection, select our base, and choose the table.
Note: You can also add queries to filter by recently added.
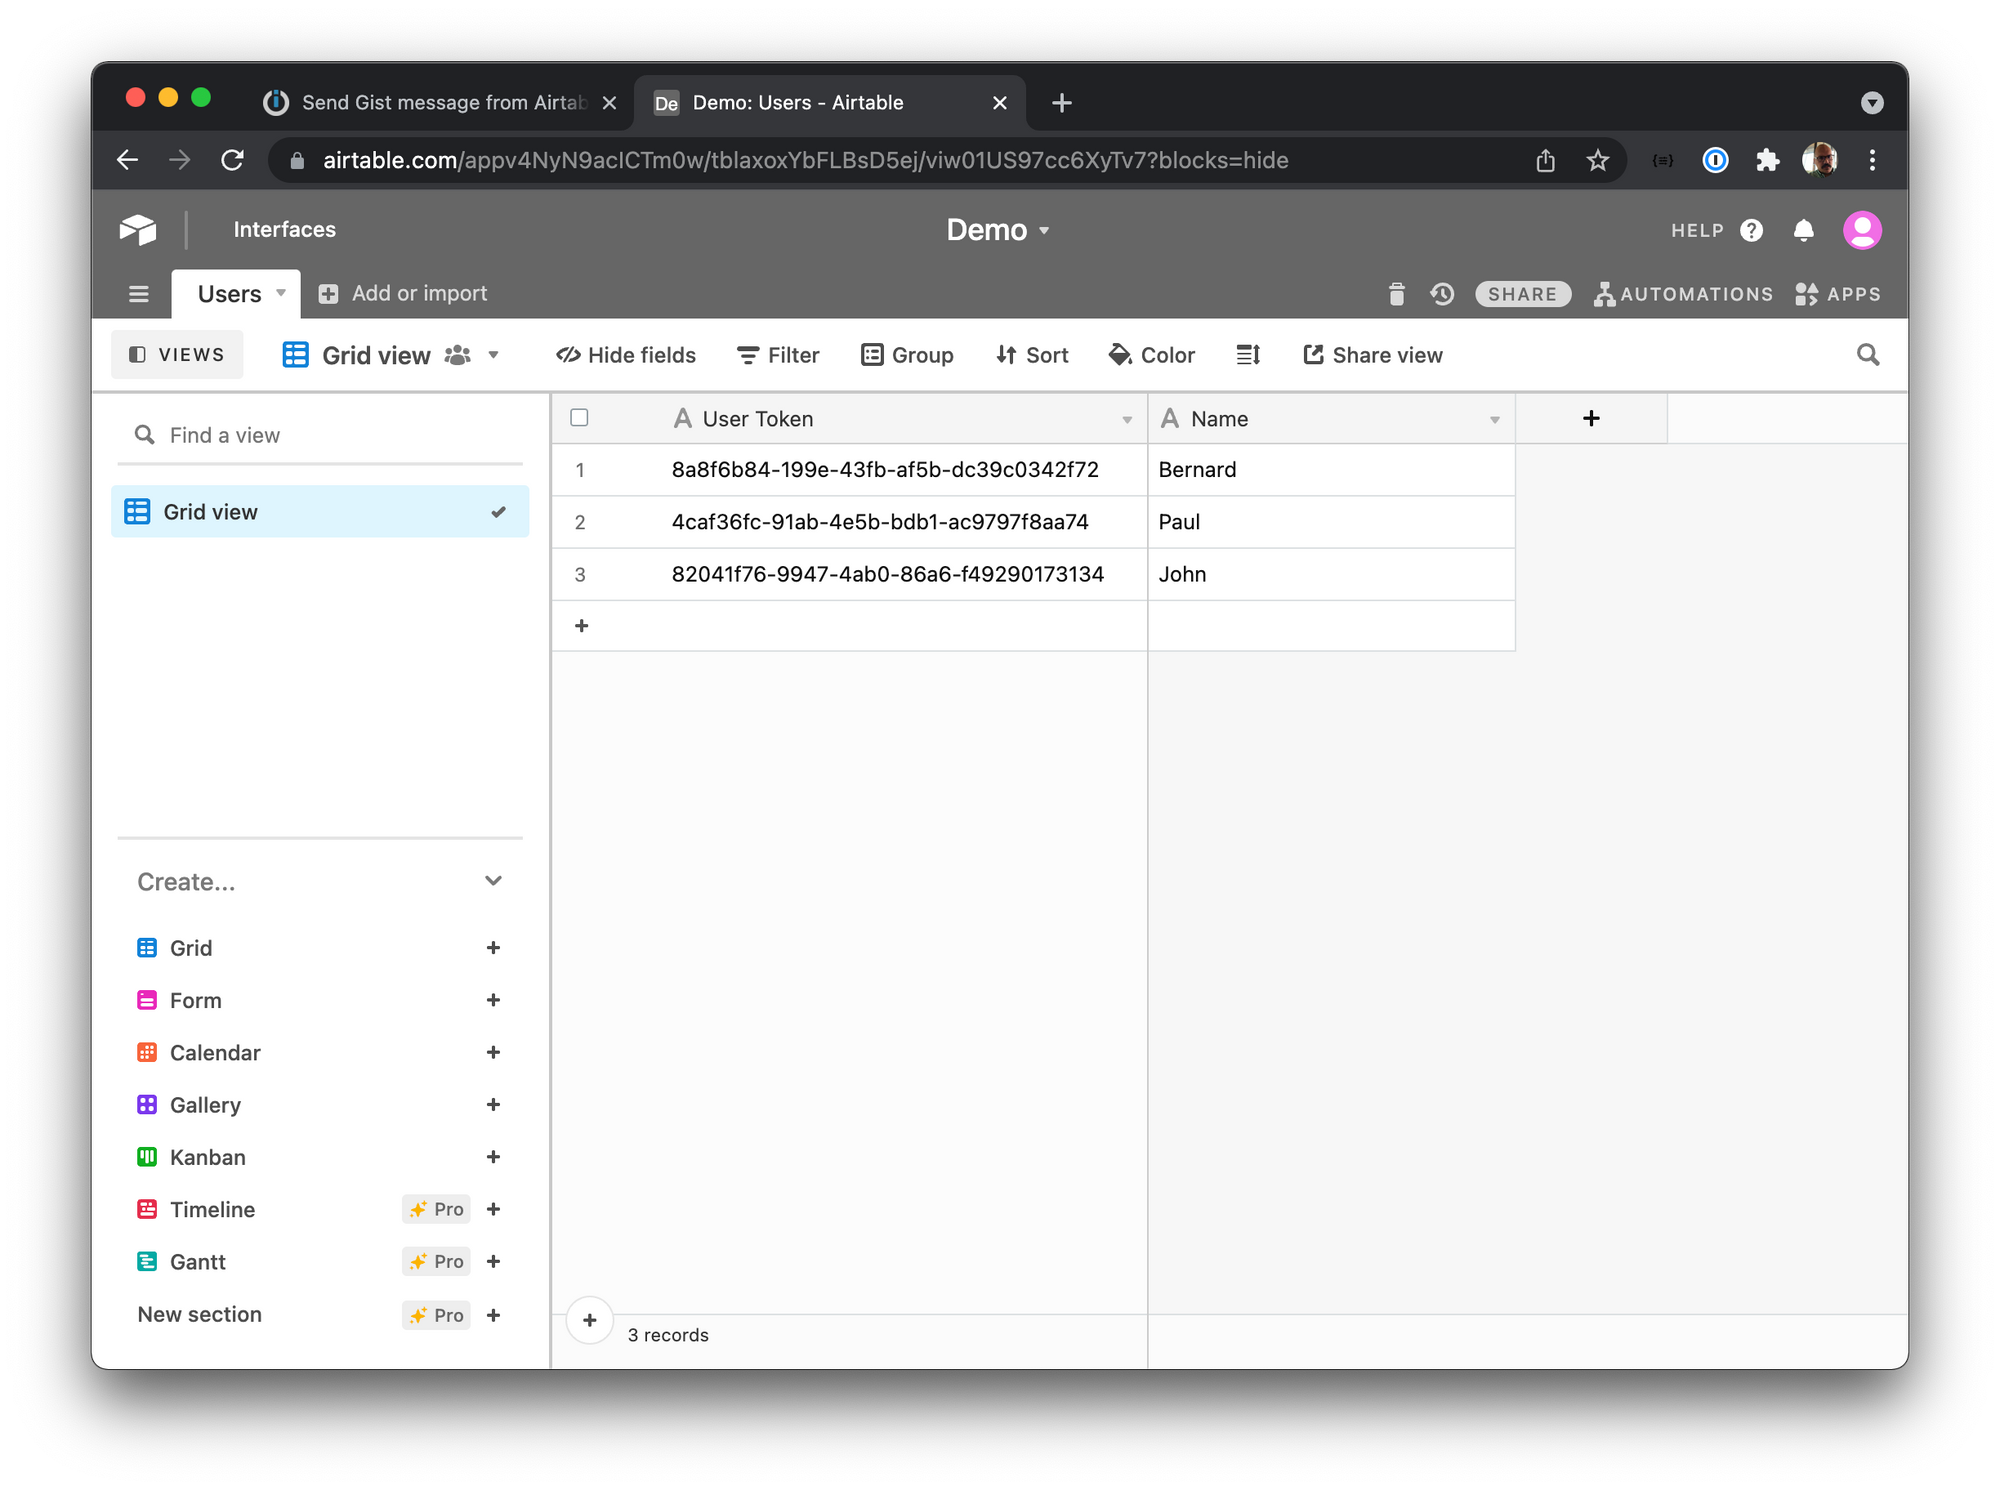
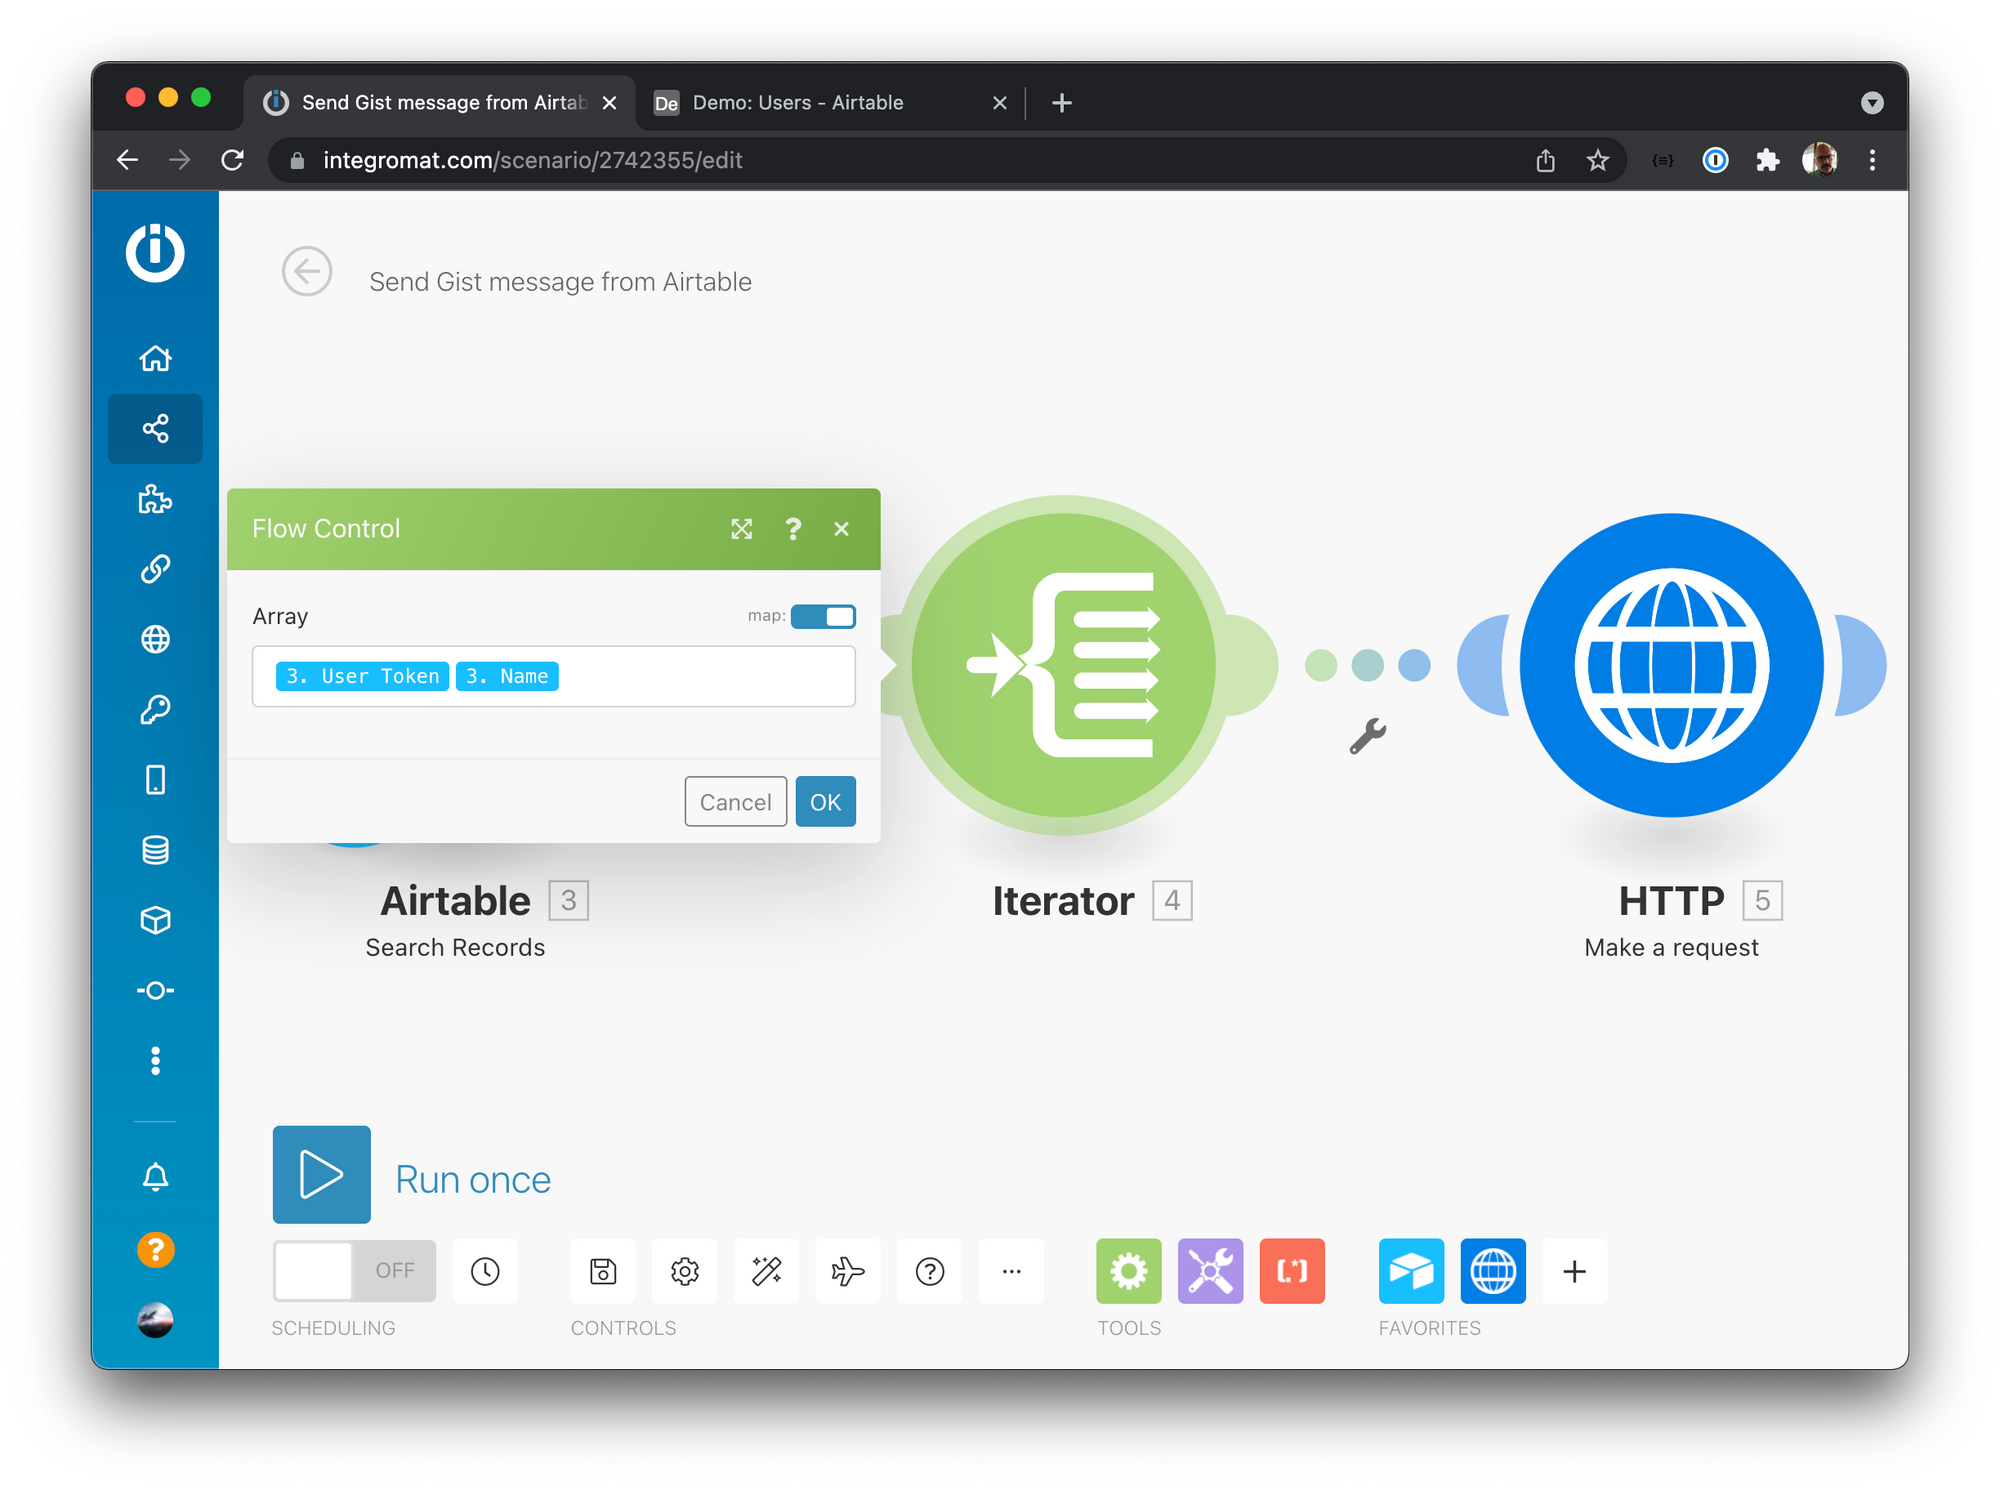
The iterator module allows us to get records from our AirTable query and extract the fields we need. In our case, we need the User Token and Name fields.
The last step will use the data from the iterator to build a message and send it to every user in the list.
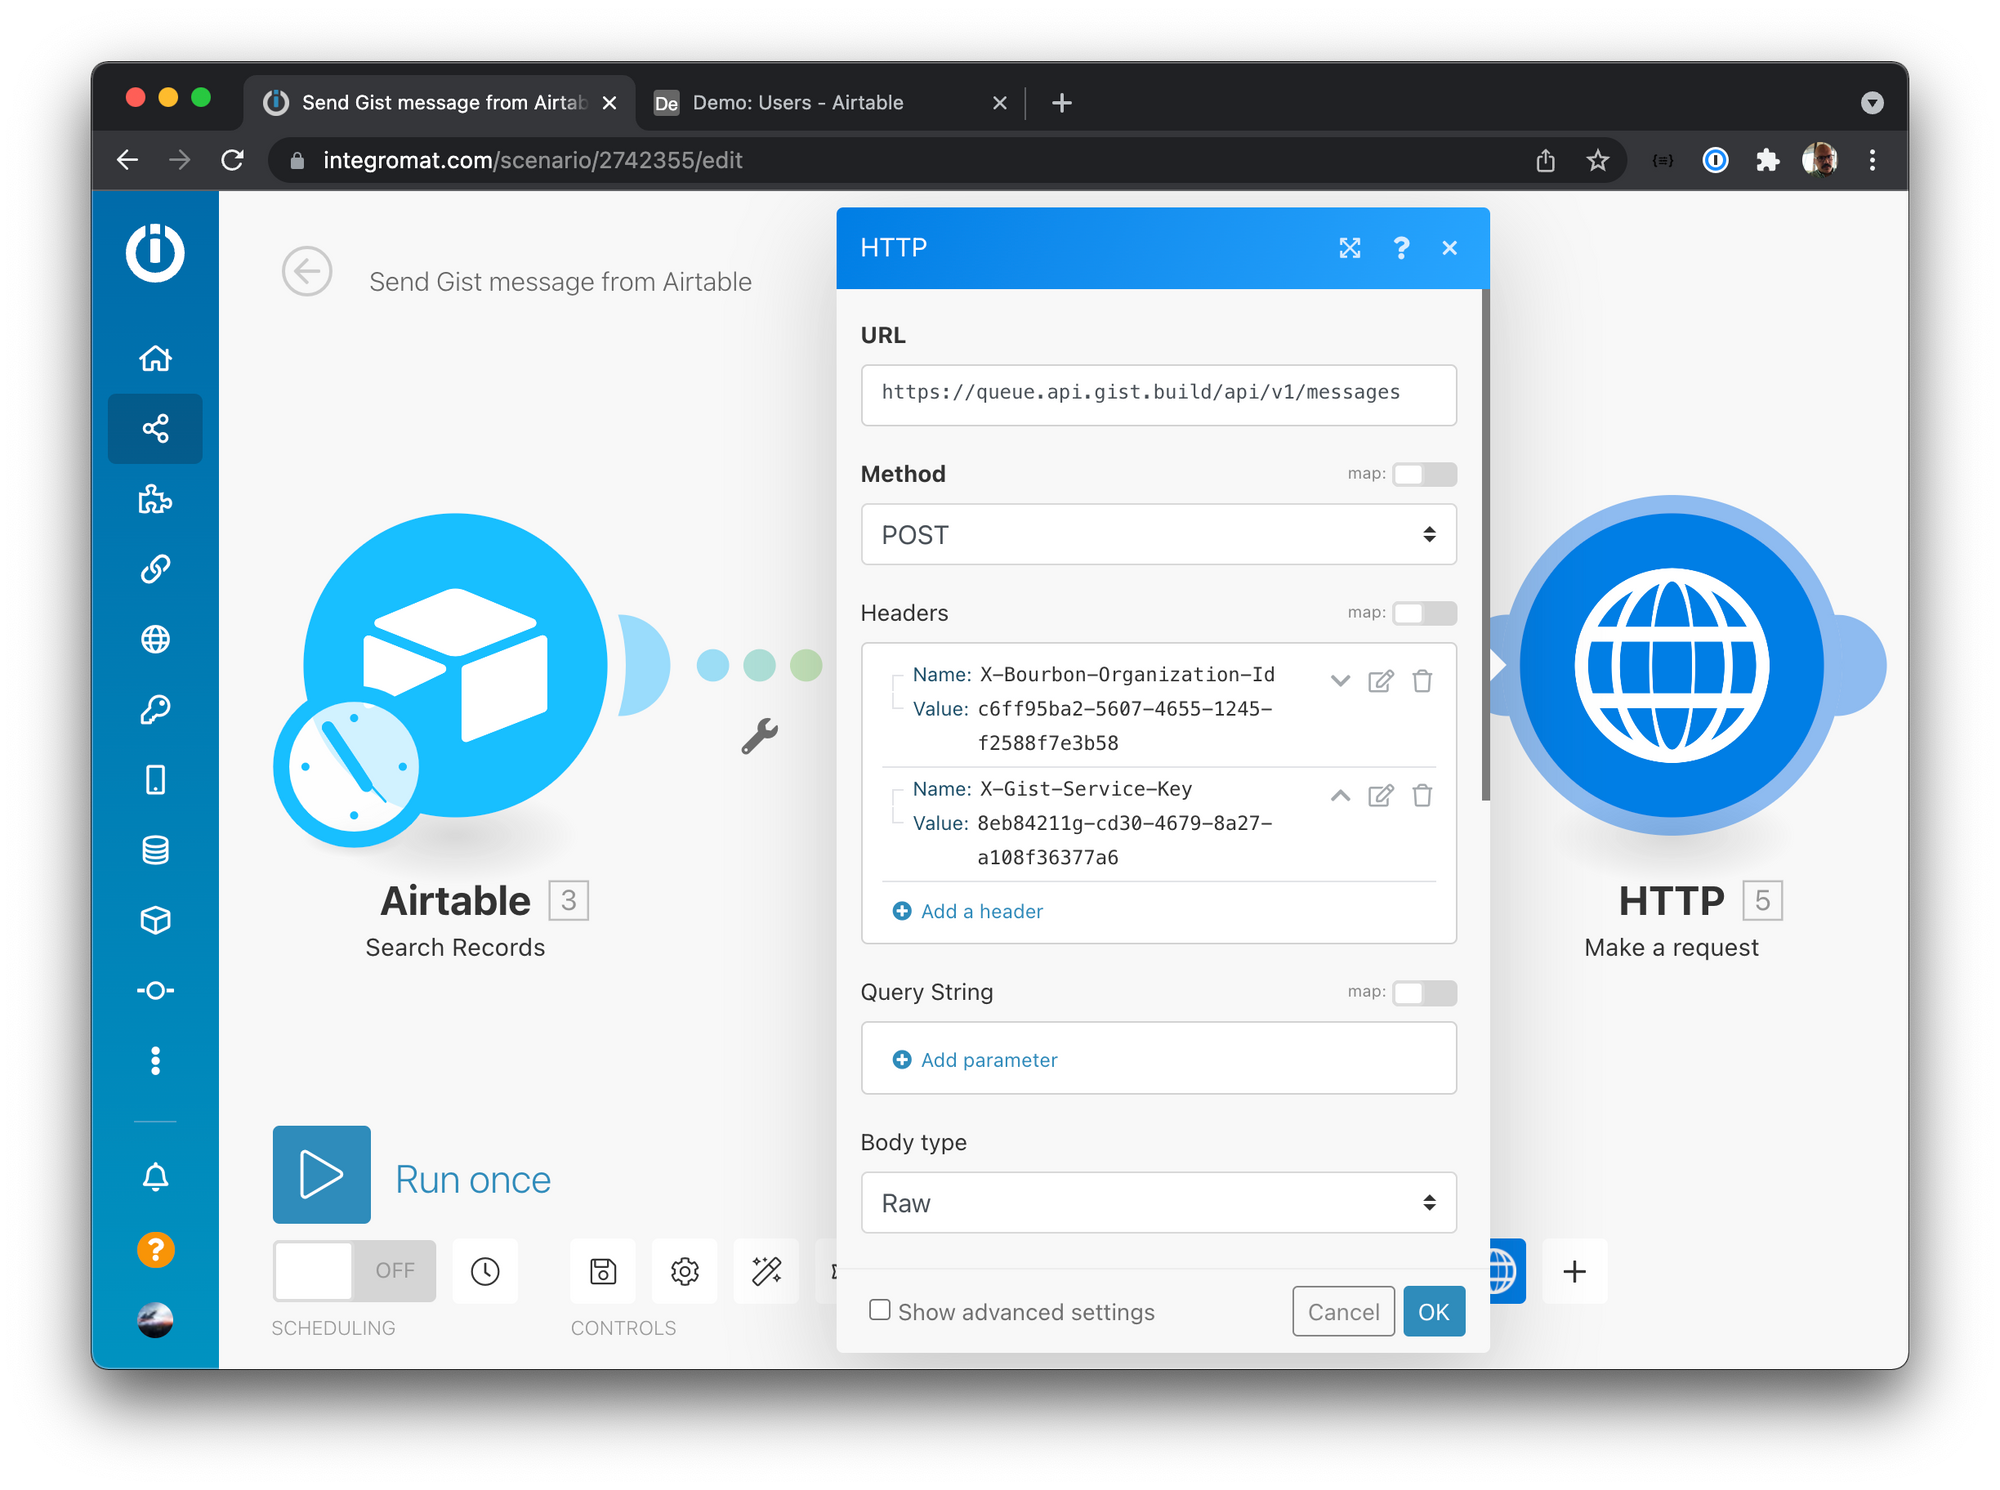
Add an HTTP module after the iterator and configure with the following:
- URL:
https://queue.api.gist.build/api/v1/messages - Method:
POST
Headers
X-Bourbon-Organization-Idvalue can be copied from integrations.X-Gist-Service-Keya new service key needs to be created from service keys.
Content
- Body type:
Raw - Content type:
JSON (application/json)
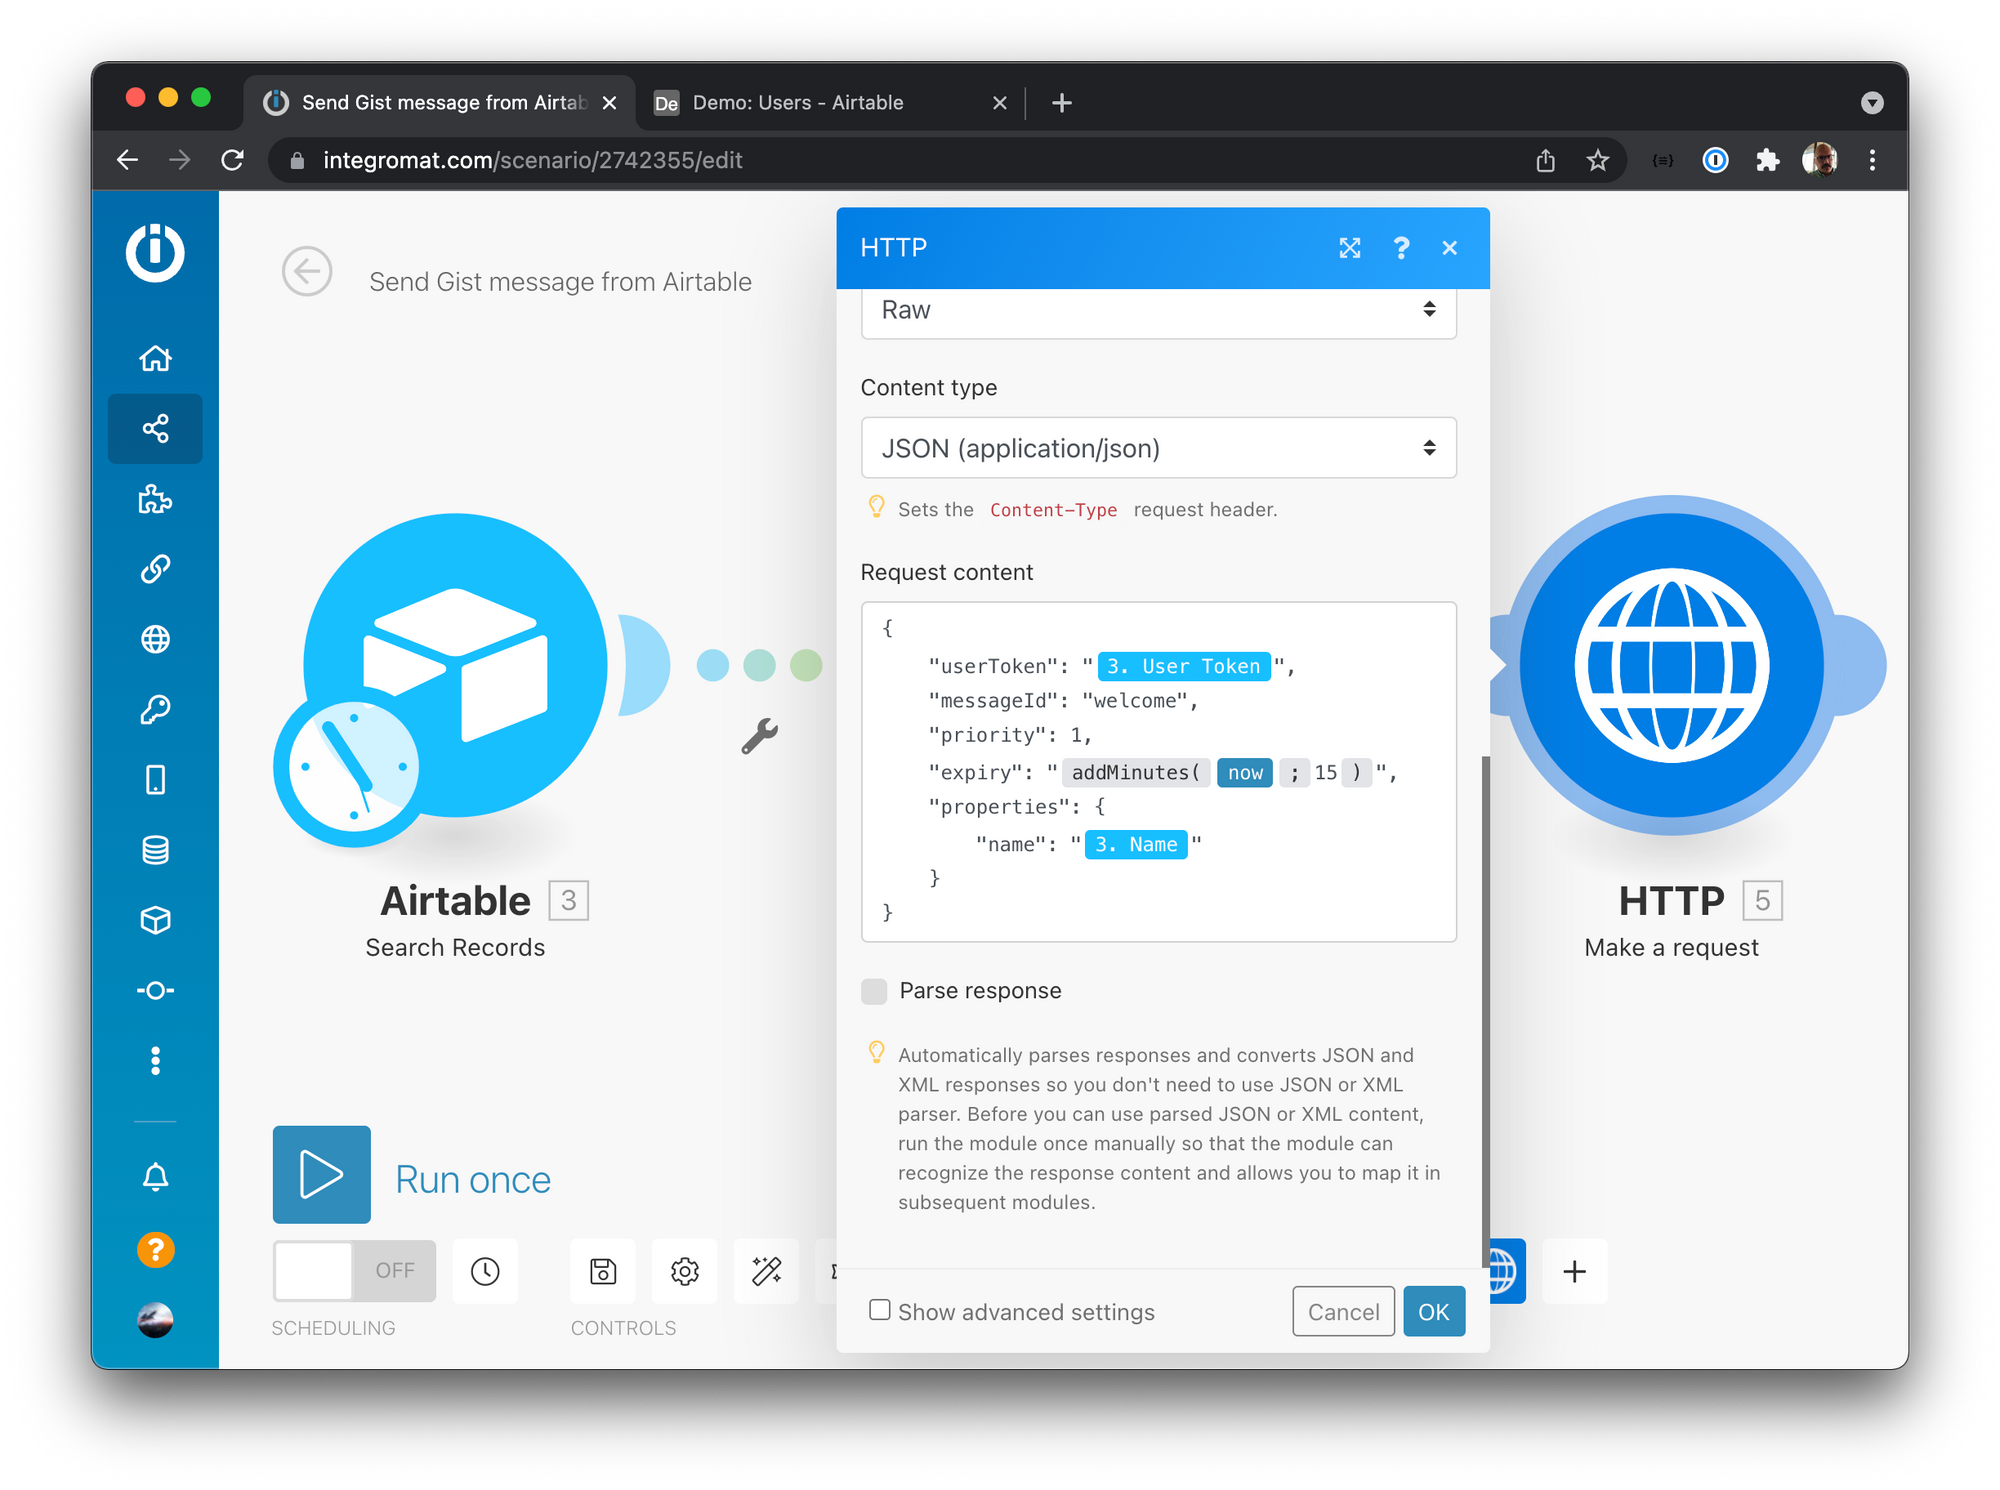
Request Content
{
    "userToken": "{{3.`User Token`}}",
    "messageId": "welcome",
    "priority": 1,
    "expiry": "{{addMinutes(now; 15)}}",
    "properties": {
        "name": "{{3.Name}}"
    }
}
Let's break the request down:
- User Token - The unique identifier for our user
- Message Id - The Gist message we want to show
- Priority - 1 means top priority, messages are shown in order of priority
- Expiry - We want the message to expire 15 minutes from now
- Properties - Can include any custom property. In this case, we want to include the user's first name in the message.
Full webhook documentation is available here.
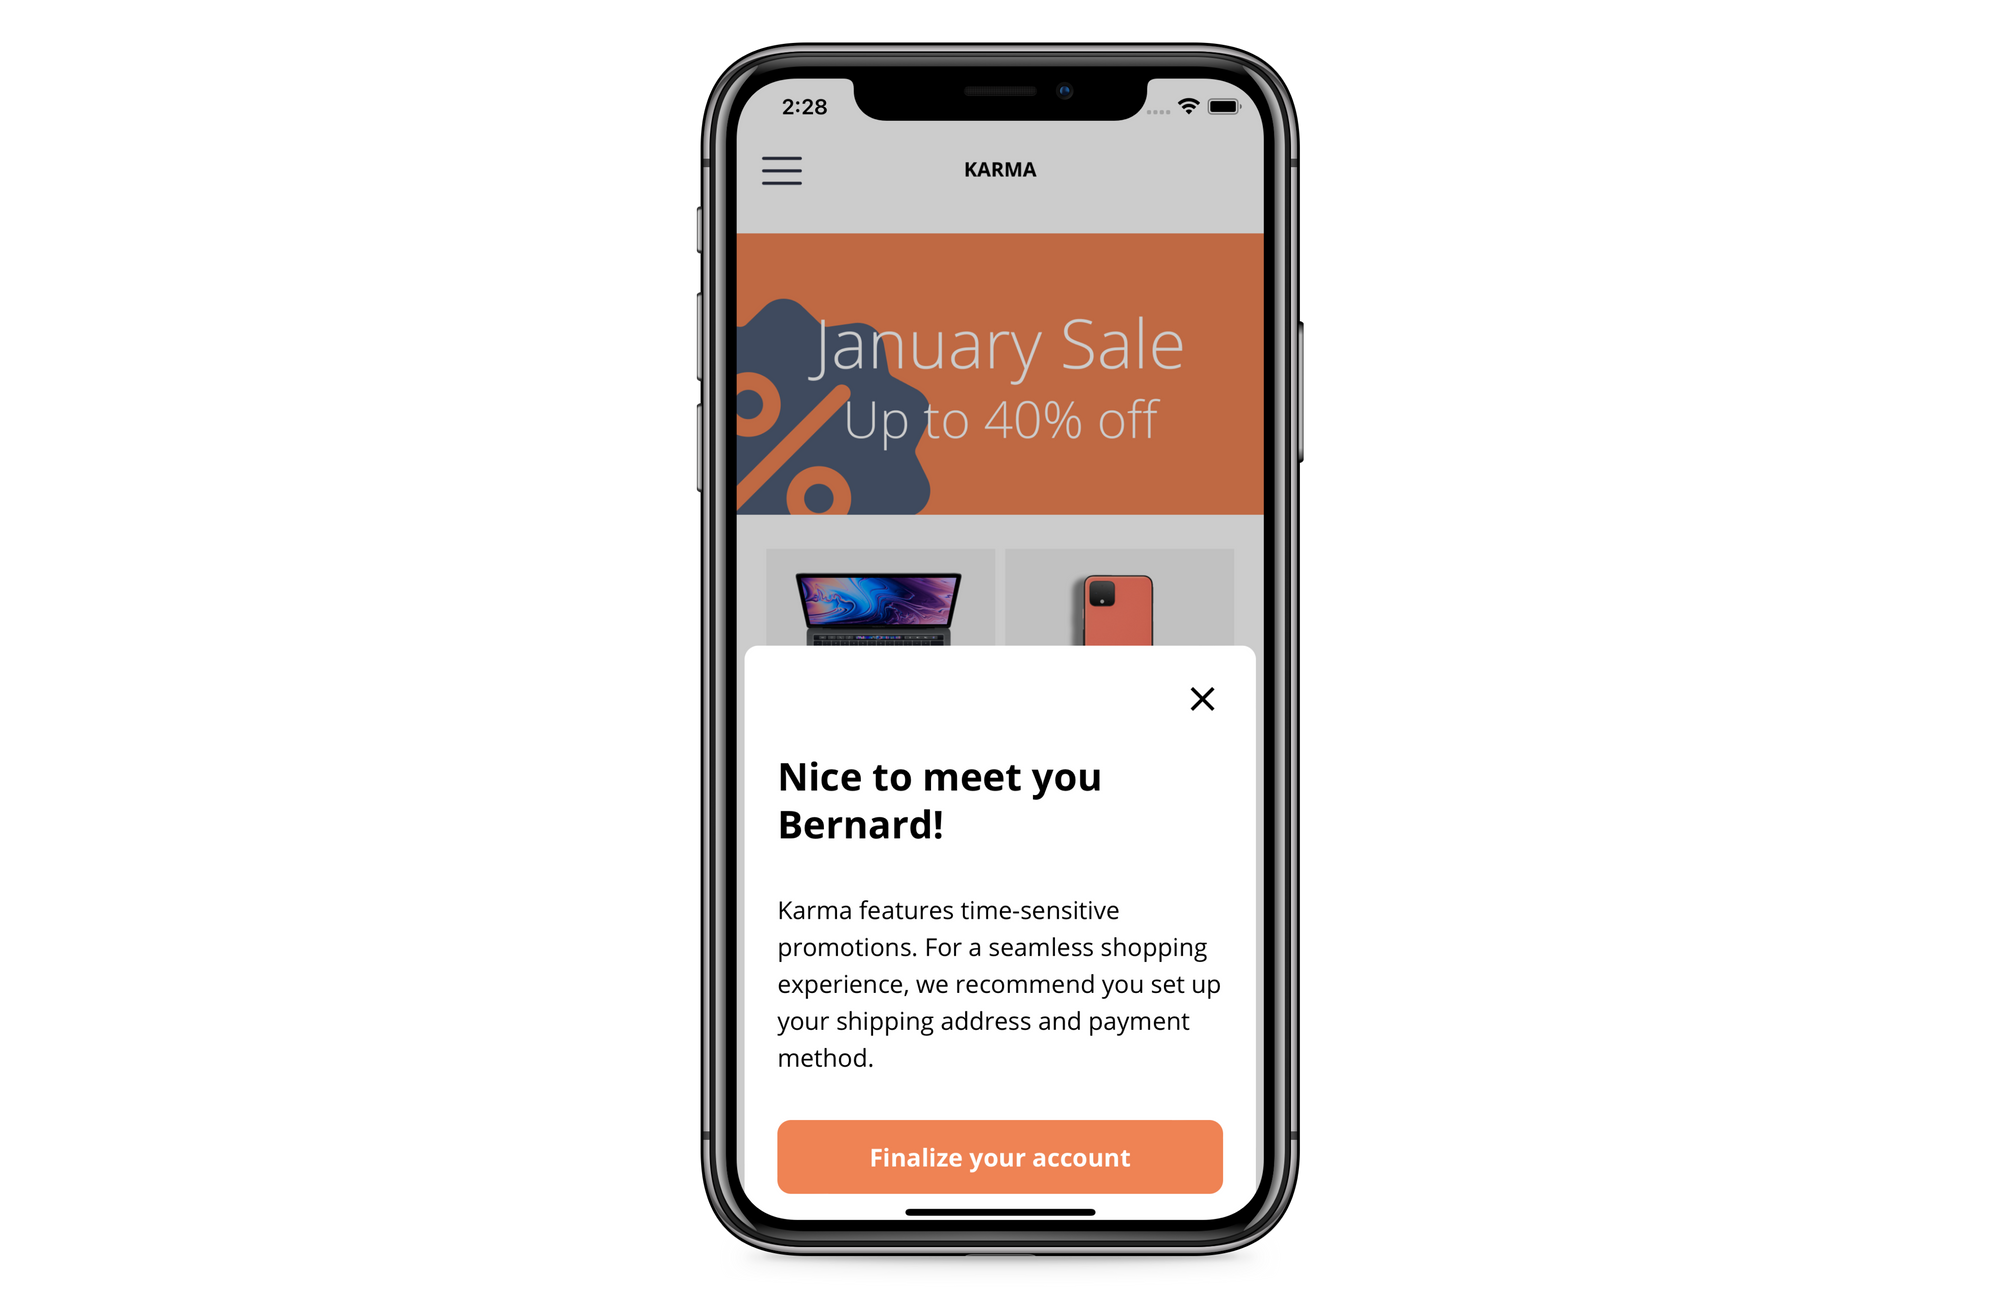
Running the scenario will send a personalized message to every user in the table. Gist is available on Web, iOS & Android so the customer can be reached on the platform of their choice.
Interested in hooking up Integromat with Gist? head over to gist.build and create your free account.